The scenario here may not be the same with you but the point is you want your bash alias to work with parameters.
Say I want to display a files content in colors and I want the output to display line numbers as well.
For the color part, I used pythons syntax highlighter called pygments and I used bash built-in line numbering command called nl.
Now to achieve my goal, I have to pipe nl to the result of pygmentize:
pygmentize test.php | nl
This is quite a hassle especially if you have to do it frequently only with different files. Unfortunately, bash alias does not directly accept parameters. The solution is to create a bash function.
ccat() { pygmentize $1 | nl }
or multi-line:
function ccat() {
 pygmentize $1 | nl
}
I named the function ccat (custom cat) because it works like a cat command but the syntax is highlighted.
Put this function in ~/.bashrc and then restart your terminal or use source:
Create New Document context menu item missing in Nautilus 3 6 3
I recently installed the new Ubuntu Gnome 13.04 which comes with Nautilus(Files) 3.6.3. While I am loving Ubuntu Gnome one annoying thing missing from Nautilus(Files) is the ability to right click and create a blank file(previously called "Create New Document" in the context menu) . It was decided that this feature would be removed in the newer versions of Nautilus which seems like a strange feature to remove to me as it is incredibly useful.
If you would like to add the option back in you simply need to run the following command at the Terminal:
touch ~/Templates/Text File.txt NOTE: you can add other types of files to the templates folder and they will also appear n the context menu.
Now you can create your own f@ke login page to hack into others account and ip address. Fake login page is a fake page which you can use to hack others username and password. Fake login page looks exactly like the original page and if someone login in your page using his original username and password, the username and password will be mailed to you The process of Hacking anyone�s id using fake login pages is known as Phishing
Now let�s learn how to create your very own fake login page.
{1} Open www.jotform.com and Sign Up. {2} then Login there with your newly registered account. {3} now click on � Create your first form�. {4} Now delete all the pre-defined entries, just leave �First Name:� (To delete entries, select the particular entry and then click on the cross sign.) {5} Now Click on �First Name:� (Exactly on First Name). Now the option to Edit the First Name is activated, type there �username:� (for Gmail) or YahooId: (for Yahoo) {6} Now Click on �Power Tool� Option (In right hand side�) {7} Double click on �Password Box�. Now Click the newly form password entry to edit it. Rename it as �Password:� {8} Now Click on �Properties� Option (In right hand side�). These are the form properties. {9} You can give any title to your form. This title is used to distinguish your forms. This Title cannot be seen by the victim. {10} Now in Thank You URL you must put some link, like http://www.google.com or anything. Actually after entering username & password, user will get redirect to this url.(Don�t leave it blank�) {11} Now Click on �Save�. After saving, click on �Source� Option. {12} Now you can see two Options, namely �Option1? & �Option2?. Copy the full code of �Option2?. {13} Now open Notepad text editor and write the following code their. Paste the Option2 code here {14} And now save this as index.html. And then host it, mean you will have to put it on the internet so that everyone can view it. Now i think that you would be knowing it and if in case you do not know it please leave a comment with your email-id and i will mail you how to do it. Now you can view it by typing the url in the address bar. NOTE: If u want to send it to the internet, then first you will have to create a hosting account which you can create on www.110mb.com and there are many other sites which you can find on the internet very easily. I suppose that you created your account at 110mb.com now login to your account then click on �File Manager�, then click on �upload files� or just �upload�. Then select the file which you want to send to the internet and click on upload. And you are done. Now you can access you file on the net by just typing the url ofthe file. And you will receive password of the users that login to your site through email-id which you�ve entered while creating the form.
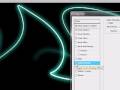
Create an Explosive Color Swath Photoshop Tutorial
Browse|Upload
Create an Explosive Color Swath: Photoshop Tutorial
Loading...
298,520
Uploaded by tutvid on Dec 5, 2009
Be sure to follow along with this quick tutorial because every time you do it you will get something different, sometimes the results will be awesome, other times not so awesome, but any way you slice it you will get some cool artwork.
We will talk about some tricks using filters and blend modes, brushes, warping, and even how to get a cool smooth color overlay effect. Follow along and you are sure to have a great time!
Follow me on Twitter! http://www.twitter.com/tutvid Be sure to check out http://www.tutvid.com Check out the blog @ http://tutvid.wordpress.com
1,494 likes, 62 dislikes
As Seen On: Photoshop-Weblog
see all
All Comments (809)
I cant click perspective!? OMG HELP!
GreeninjaX 4 days ago
does it work on other ways? Cuz I dont know how to? do it other style
carlojeromepablo 5 days ago
This has? been so useful to me, like all of the tutvid videos. Thank you soo much! xxx
chickennuggetdream 1 week ago
@warrior1129 same? problem here too!!!!!!!!!!!
iCreate14 3 weeks ago
@rkardopires98 when u start a new document set the background? to white instead of transparent
iCreate14 3 weeks ago
@hojha17 its not under dustortion in? CS5 just near the top of the filter menu
iCreate14 3 weeks ago
@k8ehud1981 it wont be under distortion on CS5 just near the top of the filter menu ?
iCreate14 3 weeks ago
thank you man! Ive learnt a lot from your? videos
TheGrimstalker 3 weeks ago
@k8ehud1981 Its not? in distort its under just "Fitler"
LegionOfZombies 3 weeks ago in playlist LegionOfZombiess favourites
@zabiacko1 Watch the tutorial, he changed the brush setting to make one click have multiple? brushes in random places across the the picture.
DaFaiGai 1 month ago
View all Comments �
7:03How to Make Glowing Lines in Photoshop Part 1by Blender3danimator160,302 views
Featured Video
13:36Photoshop CS4 Tutorial: Create a Colorful Aurur...by tutvid539,233 views
12:09Make a Shattered Dagger Poster: Photoshop Tutorialby tutvid135,837 views
Create a live system ISO for your Ubuntu based Linux machines using Systemback
By Jack Wallen December 11, 2014, 4:47 AM PST
Jack Wallen introduces you to an easy way to create live ISO images of your currently running Linux system with Systemback.
You have that Linux desktop or server precisely how you want it and are interested in either creating a spot-on backup or a live ISO that you can then install on other (similar) hardware. How do you do it? You could go through the process of learning a number of commands to take care of the process, or you could install and use a handy tool called Systemback. The Systemback tool allows you to create restore points, backups, and live images of a running system. Currently, it only works for Ubuntu derivatives based on 14.04, 14.10, and 15.04. It does, however, work like a champ (and does so quite easily). I want to show you how to install and quickly make a live image of your current Linux system.
Installation
You wont find Systemback in the standard repositories, so you must first add the repo with the command: sudo add-apt-repository -y ppa:nemh/systemback Now, update apt with the command: sudo apt-get update Finally, install Systemback with the command: sudo apt-get install systemback Youll have to okay the dependencies before the install will begin. The dependencies will vary, based on what you have installed. At this point, you should be able to start Systemback from the Unity Dash or your desktop start menu. You can also start Systemback from the command line with: sudo systemback You are now ready to create a live ISO.
Usage
Using Systemback is quite easy. From the main window (Figure A), select the location to house the ISO image (by clicking the ... button under Storage Location). Figure A
The Systemback main window.
Click the Live system create button and, in the new window (Figure B), give the live system a name, change the storage location (this location will need to have more than 4 GB of available space), and click Create new. You can optionally include user data files by checking the associated box. Figure B
Creating the live ISO image.
Note: If your .sblive file is larger than 4 GB, the conversion to a ISO is not possible. This is a file system limitation. Depending on the size of your installation, the process will take some time to complete, so grab a cup of coffee or administer a server or two. After its installed, you should find an .sblive image in the defined storage location ready to convert to ISO. This image can either be written to a USB device or used to create a live ISO image. From the Created Live images window, select the image you want to convert, and then click Convert to ISO. When this process is completed, youll find the .iso file in the storage location ready to be written to disk. With that disk, you can then install the live image on other machines. The best time to use Systemback is on a close-to-newly installed system. This is simply because of the file system size limitation. If youve installed too many applications on the system, the size will reach beyond 4 GB, and you wont be able to convert it. You can, however, still create restore points for a system. To create a restore point, first make sure youve selected a Storage directory, and then click the Create New button. Once youve created a restore point, you can then go back to that restore point by simply selecting it from the left side of the window (Figure C) and then clicking System Restore on the right side. Figure C
Restoring from a restore point.
In the resulting window (Figure D), select the type of restore you want to do, if you want to include user configuration files, and click Next. This will begin the restore process. Figure D
Restore point options.
Systemback is a great way to create live images based on a pre-existing system and restore points in case you need to roll a Linux machine backward. Do you administer or use Linux machines? If so, what do you use for your Linux backup/restore systems? Share your experience in the discussion thread below.
Create fake Facebook Post Message and Twitter Tweets for fun
Facebook and Twitter are the right places to make anything reach a lot of people. We come across many fake funny conversations that are being posted on Facebook and Twitter. They may be between politician and a common man or between a cricketer and a selection committee member. Have you ever felt excited and thought of creating one?
If you are looking for the right source to create fake Facebook Status and Tweets, then this article would be a great help for you. I will take you through few online sources, which helps you create such fake Facebook Status and Tweets easily.
Create Fake Facebook Post and Tweets
Creating such funny fake Facebook Status and Tweets is easy. There may be many sources and tools, but I would take you through free and best sources and here are they.
The Wall Machine � Create fake Facebook status
The Wall Machine is really a fun tool for creating fake Facebook status posts for free. Initially, you need to login, using your Facebook account and the fun begins soon thereafter.
You can upload the picture of the person and start typing the status. It allows you to add the people, who you want to �Like� the post and edit the time of post. It provides options to add comments along with profile pictures to the post created � and this is really exciting. They generate examples for everything you want to add and you need to edit them. You can add friendship update, relationship update, events and more.
After you are done with adding the status and comments, you can save it as an image. While saving, it asks you to enter the title and tags to make it available for everyone as fun Facebook images. You can save it as Public or Private. Once you click on the Save button, you can share it to your Facebook or to any social networking website.
Status Clone � Create fake Facebook message without login
Status Clone allows you to create fake Facebook Status using the Classic and the Timeline format. It does not require any login. So, people who do not use Facebook or do not wish to login using Facebook, can make use of Status Clone to create fake Facebook Post.
In this case, you need to enter the name, status text, upload the image, people whom you want to Like the created post and comments. While you are adding these things, you can see the preview of your fake post being shown beside. Once done, click on �Create Image and Save�. You can share the created fake post anywhere you want.
Simitator � Create funny Facebook chat
Simitator helps you to create not only fake Facebook Status, but also fake Facebook chat. You can create a fake Facebook chat which looks like you had a chat with say a cricketer or a film star or any other celebrity. Creating fake Facebook chat is the most exciting thing being done using Simitator. You can preview the chat you are creating and download the image once done.
Lemme tweet that for you- Create fake tweets
Lemmetweetthatforyou allows you to create fake Tweets for fun. Just visit the website and enter the username of the person you want to create the Tweet for. It automatically updates the profile picture by searching in Twitter. Then, type the tweet you want. You can even edit the number of Retweets and Favorites.
It also allows you to edit the time and date of the Tweet created. Once done, save it as an image, by just taking the screenshot or share it to your Twitter account.


Cuz I dont know how to? do it other style
?